Running a small restaurant means every dollar counts. When you're juggling rent, ingredients, staff, and marketing, spending thousands on a professional food photoshoot can feel completely out of reach. But here's what many restaurant owners don't realize: you don't need a huge budget to achieve professional-looking food photos.
In 2026, the tools available to small business owners have leveled the playing field. Between powerful smartphone cameras, free editing software, and AI-powered photo enhancement, you can create menu images that rival those of big-budget restaurants. This guide walks you through every affordable strategy, from setting up a DIY photo station in your kitchen to leveraging AI tools that transform basic snapshots into scroll-stopping images.
Whether you're launching a new restaurant, updating your delivery app listings, or building a social media presence from scratch, these tips will help you get the most out of your photography efforts without draining your wallet.
Why Food Photography Matters for Small Restaurants
Before diving into the how, it's worth understanding the why. For small restaurants, great food photography isn't a luxury — it's one of the most impactful investments you can make.
The Competitive Edge You Can't Ignore
When a potential customer searches for restaurants nearby, they're comparing you against every other option on the screen. On delivery apps like Uber Eats, DoorDash, and Glovo, your food photos are your storefront. Studies consistently show that menu items with photos receive up to 70% more orders than items without. If your competitors have appetizing images and you don't, you're losing sales before a customer even considers your food.
Delivery Apps Have Changed the Game
The explosion of food delivery has transformed how customers choose where to eat. When someone opens a delivery app, they're scrolling through dozens of options in seconds. Your food photo is the first (and sometimes only) thing that determines whether they tap on your restaurant or keep scrolling. A well-lit photo of your signature burger can be the difference between a new loyal customer and a lost sale.
Social Media Runs on Visuals
Instagram, TikTok, and Facebook are visual-first platforms. Restaurants that post attractive food photos consistently see higher engagement, more followers, and more foot traffic. According to recent surveys, 69% of millennials and Gen Z photograph their meals before eating — and they share the results. Great photos attract shares; mediocre ones get ignored. Your social media presence is essentially free advertising, but only if the content looks good.
Building Customer Trust
Food photos tell a story about your restaurant's quality, attention to detail, and professionalism. When customers see clean, well-composed images of your dishes, they trust that the food will live up to expectations. Conversely, dark, blurry, or poorly staged photos send a signal — even subconsciously — that the restaurant may not care about quality. First impressions are formed in milliseconds, and your photos are often the very first impression a customer gets.
Setting Up a DIY Photo Station
You don't need a studio or expensive equipment. With a dedicated corner of your restaurant and a few inexpensive items, you can create a photo setup that produces consistently great results.
Choose a Dedicated Corner
Pick a spot near a large window that gets plenty of natural light during the day. This will be your go-to photography station. Ideally, choose a location that's away from the busy kitchen so you have a few minutes of uninterrupted shooting time. A small table or countertop near a north-facing or east-facing window works best, as the light will be soft and even throughout the day.
Natural Light is Your Best Friend
Professional food photographers almost always prefer natural light, and it's completely free. Position your photo station so that window light falls on the dish from the side or at a 45-degree angle. Side lighting creates depth, highlights textures, and makes food look three-dimensional. Avoid placing food directly under overhead lights, which flatten the appearance and create unflattering shadows.
Simple Backgrounds That Look Professional
A clean background makes food the star of the photo. Here are budget-friendly options that look surprisingly professional:
- White posterboard ($3-5): Creates a clean, modern look. Buy a few sheets and replace them as they get dirty
- Large ceramic or stone tiles ($5-10 each): Available at any hardware store. Marble, slate, or dark wood-look tiles create upscale backgrounds
- Wooden cutting boards ($10-15): Perfect for rustic or artisanal vibes. They work especially well for burgers, charcuterie, and baked goods
- Dark fabric or paper ($3-5): A sheet of black or dark navy creates dramatic, moody shots that make vibrant dishes pop
Basic Props to Keep on Hand
Props add context and visual interest without costing much. Keep these nearby:
- A few clean, unchipped plates in neutral colors (white is most versatile)
- Simple linen or cloth napkins in muted tones
- Basic silverware or chopsticks
- A small bowl or ramekin for sauces or dips
- Fresh herbs or ingredients from your kitchen for garnishing
Smartphone Photography Tips for Restaurant Owners
Your smartphone is already a capable food photography tool. Modern phones from 2024-2026 have cameras that rival entry-level DSLRs for this kind of work. Here's how to get the most out of what's already in your pocket.
Use Portrait Mode
Portrait mode creates a shallow depth of field, blurring the background while keeping your dish in sharp focus. This is the same effect professional photographers achieve with expensive lenses. It immediately makes photos look more polished and draws the viewer's eye directly to the food.
Turn On Grid Lines
Enable the grid overlay in your camera settings. This divides the screen into nine equal sections, helping you apply the rule of thirds — one of the most fundamental composition principles. Place the most important element of your dish (the juiciest part of the steak, the drizzle of chocolate) at one of the four intersection points for a naturally balanced, professional composition.
Understand HDR
HDR (High Dynamic Range) mode captures multiple exposures and blends them together, preserving detail in both bright and dark areas. For food photography, this is useful when you're shooting near a window — it prevents the food from being too dark while the window is too bright. Most modern phones enable HDR automatically, but check your settings to make sure it's on.
Editing Apps That Make a Difference
After shooting, a few quick edits can elevate a good photo into a great one. Download one of these free apps and spend 60 seconds per photo adjusting brightness, contrast, and saturation:
- Snapseed (free): Google's powerful photo editor with professional-grade tools. The "Selective" tool is perfect for brightening just the food
- Lightroom Mobile (free tier): Industry-standard editing with intuitive sliders. Great for batch-applying the same adjustments across multiple photos
- VSCO (free tier): Excellent preset filters that create a cohesive look across your entire feed
Lighting on a Budget
Lighting is the single most important factor in food photography. The difference between an amateur snapshot and a professional-looking image almost always comes down to light. Fortunately, great lighting doesn't require expensive equipment.
Maximize Natural Light
Natural window light is the gold standard for food photography — and it costs nothing. Schedule your photo sessions during the brightest part of the day, typically between 10 AM and 2 PM. Overcast days actually produce the best results because clouds act as a giant diffuser, creating soft, even light without harsh shadows.
The $2 Reflector Trick
Buy a sheet of white foam board from any craft or dollar store. Place it on the opposite side of the dish from the window. It bounces light back onto the shadow side of the food, filling in dark areas and creating a more evenly lit image. This is the same technique professional photographers use with expensive reflector panels — except yours costs $2.
Window Positioning Matters
Experiment with different angles relative to your window:
- Side lighting (90 degrees): Creates beautiful texture and depth. Best for dishes with interesting surfaces like grilled meats or textured breads
- Front-side lighting (45 degrees): The most versatile angle. Flattering for almost any dish
- Backlighting (behind the dish): Creates a glowing, ethereal effect. Perfect for beverages, translucent foods, and steam shots
Avoid Overhead Fluorescents
The fluorescent lights in most restaurant kitchens are the enemy of good food photography. They cast a greenish or yellowish tint, create unflattering top-down shadows, and make food look dull and unappetizing. When shooting, turn off overhead lights in your photo area and rely entirely on window light. If you must shoot in the evening, a basic LED panel light ($20-40) is far better than fluorescents.
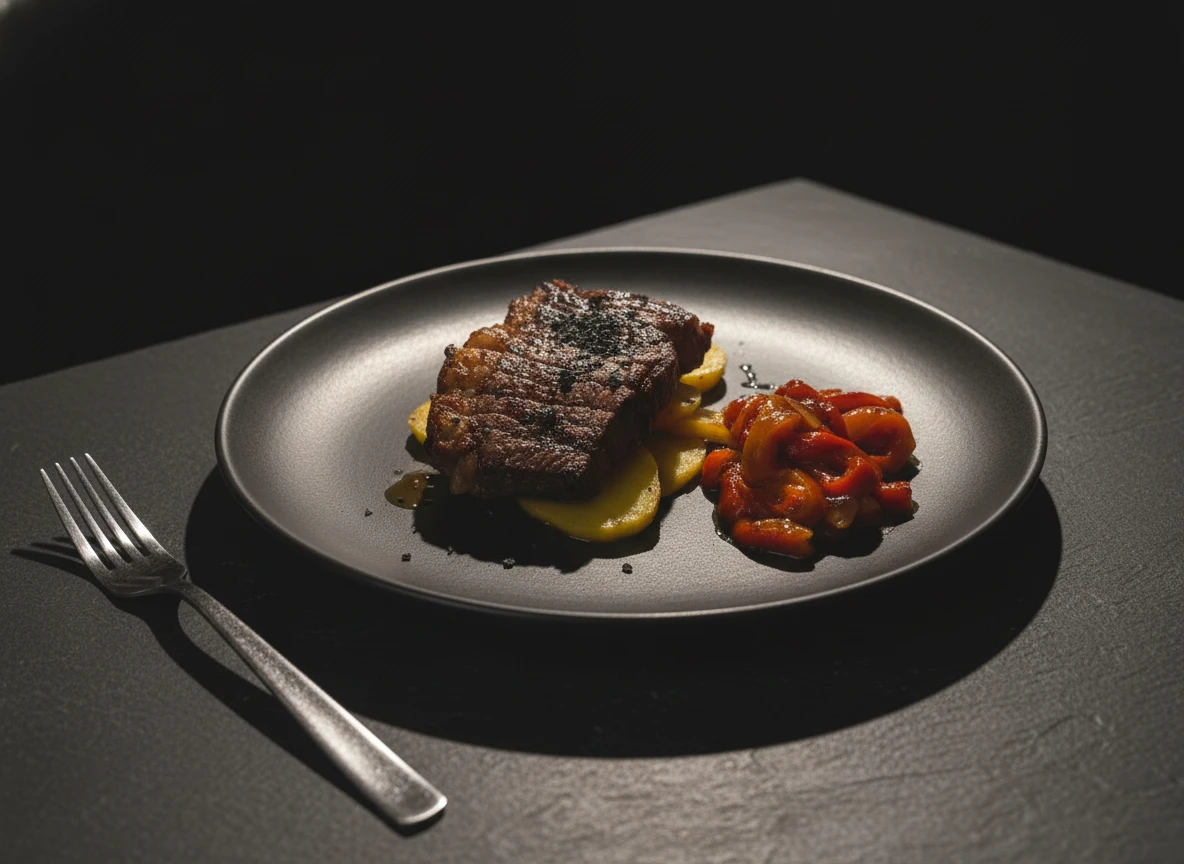
Styling Tips That Don't Cost a Thing
Food styling is what separates a casual snapshot from a photo that makes people hungry. The good news is that the most effective styling techniques use ingredients and materials you already have in your kitchen.
Fresh Herbs as Visual Magic
A sprinkle of fresh basil, a sprig of rosemary, or a scattering of chopped cilantro adds instant color, life, and visual interest to any dish. Herbs photograph beautifully and signal freshness to the viewer. Keep a small selection of fresh herbs specifically for photo sessions — they're inexpensive and make an outsized impact.
Master the Sauce Drizzle
A strategic drizzle of olive oil, balsamic reduction, chocolate sauce, or any glossy condiment adds movement and visual interest to the frame. Use a spoon to create a controlled drizzle rather than pouring directly. The key is to make it look effortless and intentional, not messy.
The Steam Trick
Steam rising from a dish communicates warmth and freshness. To capture steam in your photos, work fast — photograph the dish within the first 30-60 seconds after plating. If the steam has dissipated, place a damp, microwaved paper towel behind the dish (hidden from view) to create a realistic steam effect. Backlighting from a window makes steam especially visible and dramatic.
Clean Plates Are Non-Negotiable
Before every shot, wipe the rim and edges of the plate with a damp paper towel. Smears, drips, and fingerprints are easily overlooked with the naked eye but stand out glaringly in photographs. This takes five seconds and makes an enormous difference in the final image.
Napkin Folds and Table Settings
A casually placed napkin, a piece of cutlery at an angle, or a partially visible glass of wine adds context and makes the scene feel inviting. These details suggest a dining experience rather than just a plate of food. Keep arrangements natural and slightly imperfect — overly staged scenes feel sterile and uninviting.
Batch Your Photo Sessions
One of the biggest time and money savers for small restaurant photography is batching. Instead of photographing dishes one at a time whenever you remember, dedicate specific sessions to capture multiple items at once.
Plan Ahead
Before your session, make a shot list of every dish you want to photograph. Organize them by category or by similarity — dishes that use the same background, plate, or styling elements should be grouped together. This minimizes setup changes and maximizes efficiency.
Photograph Multiple Dishes Per Session
Set aside a two-hour window during a slow period (typically mid-morning on a weekday). Have your kitchen prepare dishes in batches of 3-4 at a time. While you photograph one dish, the next one is being plated. With practice, you can capture 15-20 dishes in a single session — enough to cover a full menu.
Schedule Seasonal Updates
Put recurring photo sessions on your calendar. At minimum, schedule one session per season to capture new menu items, seasonal specials, and refreshed takes on existing dishes. Regular updates keep your delivery app listings and social media feeds looking fresh, which signals to customers (and algorithms) that your restaurant is active and thriving.
Free and Affordable Editing Tools
Post-processing is where good photos become great photos. You don't need Photoshop or expensive software — these free and low-cost tools deliver professional results.
Snapseed (Free)
Google's Snapseed is arguably the most powerful free photo editor available. Its "Tune Image" tool lets you adjust brightness, contrast, saturation, and warmth with simple sliders. The "Selective" tool is a standout feature — tap on any area of the photo to adjust just that region. Use it to brighten the food without overexposing the background. The "Details" tool sharpens textures, making crispy edges, grilled marks, and fresh ingredients pop.
Adobe Lightroom Mobile (Free Tier)
Lightroom Mobile's free tier includes all the essential editing tools. Its biggest advantage for restaurants is the ability to save presets — edit one photo to perfection, save the settings, and apply the same look to every other photo in seconds. This creates a consistent visual style across your entire menu. The "Light" and "Color" panels are intuitive and powerful enough for professional results.
VSCO (Free Tier)
VSCO excels at preset filters that give photos a cohesive, stylized look. For restaurants building a social media brand, VSCO's warm, inviting presets create a recognizable aesthetic. Pick one or two filters that complement your food and use them consistently across all posts.
Basic Adjustments Every Food Photo Needs
Regardless of which app you use, these five adjustments will improve almost every food photo:
- Brightness: Increase slightly. Food looks more appetizing when it's well-lit
- Contrast: Bump up to make colors and textures pop without looking unnatural
- Saturation: A subtle increase makes colors richer. Don't overdo it — food should look real, not neon
- Warmth: Shift slightly warmer. Warm tones make food look more inviting and appetizing
- Sharpness: A small increase brings out textures and details that make food look tangible
When to Consider Upgrading
DIY photography is a smart starting point, but there are signs it may be time to invest more:
- Your menu has grown significantly and you need 50+ consistent images that DIY sessions can't keep up with
- You're expanding to multiple locations and need a standardized visual identity across all of them
- You're running paid advertising on social media or Google — low-quality images tank ad performance and waste your budget
- You're pitching to press or publications that require high-resolution, professionally styled images
- Your conversion rates on delivery apps are declining despite having good ratings and reasonable prices
Affordable Photographer Options
When you're ready to bring in professional help, consider these budget-friendly approaches:
- Photography students: Contact local art schools or universities. Students building portfolios typically charge $100-$300 for a session
- Mini sessions: Many professional photographers offer 1-2 hour "mini shoot" packages at $200-$600 for 10-15 dishes
- Trade arrangements: Offer meals or catering in exchange for photography. Many food photographers are genuinely excited about this kind of trade
- Shared shoots: Coordinate with neighboring businesses to split a photographer's day rate, saving everyone 40-60%
AI Tools: The Small Restaurant's Secret Weapon
Perhaps the most exciting development for small restaurant photography in 2026 is the rise of AI-powered photo enhancement tools. These platforms bridge the gap between DIY smartphone photos and expensive professional shoots.
Tools like Platora allow you to upload a basic photo of your dish and transform it with professional-quality lighting, backgrounds, and styling — all powered by AI. The result is an image that looks like it came from a professional photoshoot, at a fraction of the cost and without the scheduling hassle.
Here's why AI tools are particularly valuable for small restaurants:
- Affordable at scale: Enhance your entire menu for less than the cost of a single professional photo session
- Speed: Get results in seconds, not weeks. Perfect for daily specials or limited-time promotions
- Consistency: AI applies the same quality and style across every image, giving your menu a cohesive, professional look
- No scheduling needed: Photograph a new dish, enhance it with AI, and upload it to your delivery app — all in the same afternoon
- Iterate freely: Try different backgrounds, lighting styles, and compositions without any additional cost
AI enhancement doesn't replace a photographer for complex shoots or original creative campaigns, but for the everyday needs of a small restaurant — menus, delivery apps, social media posts — it's a game-changer that makes professional quality accessible to every budget.
Building a Consistent Visual Brand
Great individual photos are important, but what truly elevates a small restaurant's image is visual consistency. When all your photos share a recognizable style, your brand looks polished and professional — even if every image was shot on a smartphone.
Define Your Color Palette
Choose 2-3 colors that represent your restaurant's personality and use them consistently in your food photography. This could be the color of your plates, napkins, backgrounds, or even the ingredients you feature most prominently. A rustic Italian trattoria might lean into warm earth tones, while a modern sushi bar might stick with clean whites and blacks. Consistency in color creates a recognizable brand identity across platforms.
Develop a Signature Style
Pick a photography style and stick with it. Are your photos bright and airy, or dark and moody? Do you shoot from directly above (flat lay) or at a 45-degree angle? Do you include context elements like hands, utensils, and table settings, or do you focus tightly on the food? There's no wrong answer, but consistency is key. When a customer scrolls past your post on Instagram, they should recognize it as yours before even seeing the account name.
Create Templates for Social Media
Use free tools like Canva to create simple templates for your social media posts. A consistent layout — your logo placement, font choice, and color scheme — ties everything together and makes your feed look intentional. Templates save time too: just drop in a new food photo and the rest of the design is done. Create templates for different post types: daily specials, new menu items, customer reviews, and promotional offers.
Conclusion
Professional-looking food photography is no longer reserved for restaurants with large marketing budgets. In 2026, any small restaurant owner can create appetizing, high-quality images using nothing more than a smartphone, natural light, and the affordable tools and techniques outlined in this guide.
The key is to start simple and build from there. Set up a dedicated photo corner near a window. Learn the basics of smartphone photography and lighting. Use free editing apps to polish your images. Batch your sessions to save time. And when you need that extra level of quality, leverage AI tools like Platora to transform your everyday photos into professional-grade images without the professional price tag.
Remember: perfect is the enemy of good. A consistent stream of clean, well-lit photos will do more for your business than waiting months for a single expensive photoshoot. Start today, improve as you go, and watch how better food photos translate directly into more orders, more followers, and more customers walking through your door.