The angle you choose when photographing food can make or break the image. Two photos of the exact same dish, with identical lighting and styling, will look completely different depending on where the camera is positioned. One angle might highlight a burger's perfectly stacked layers, while another flattens it into an unrecognizable mess. One angle might reveal the beautiful symmetry of a charcuterie board, while another hides half the ingredients behind each other.
Understanding food photography angles is one of the most impactful skills you can develop, whether you are shooting for delivery apps, social media, or printed menus. Unlike lighting or styling, which often require equipment or props, choosing the right angle costs nothing and takes no extra time — you simply need to know where to position the camera for each type of dish.
This guide breaks down the five essential camera angles used in professional food photography, explains when each one works best, and gives you a practical framework for choosing the right angle for any dish you photograph. Combined with strong food photography composition, the right angle is the foundation of every great food photo.
Overhead / Flat Lay (90°)
The overhead angle — also known as the flat lay or bird's-eye view — places the camera directly above the dish, shooting straight down at 90 degrees. It is one of the most popular angles in modern food photography, particularly on social media and delivery platforms, because it provides a clean, graphic view that showcases the full surface of the dish.
Best Dishes for Overhead Photography
- Pizza: The circular shape, evenly distributed toppings, and flat profile make pizza one of the most photogenic subjects for overhead shots. Every topping is visible and the symmetry is satisfying.
- Salads and grain bowls: Overhead reveals the colorful arrangement of ingredients that would be partially hidden from any other angle.
- Charcuterie and cheese boards: The carefully curated spread of meats, cheeses, fruits, and crackers is designed to be seen from above.
- Table spreads: When you want to photograph multiple dishes together — a full breakfast layout, a family-style dinner, or a tasting menu — overhead is the only angle that keeps everything in frame without distortion.
- Flat pastries and tarts: Open-face tarts, galettes, and decorated cookies show their artistry best from directly above.
How to Set Up an Overhead Shot
The biggest challenge with overhead photography is keeping the camera stable and perfectly level. Any tilt will create perspective distortion that makes round plates look oval and straight lines appear skewed. For consistent results, use a tripod with a horizontal arm or a ceiling-mounted rig. If you are shooting with a smartphone, many phone tripods now include overhead adapters specifically for flat lay photography.
When shooting overhead, pay extra attention to the surface and background. Since the camera sees the entire table or surface, every element matters — crumbs, stains, and cluttered edges will all be visible. Use a clean, textured surface like wood, marble, or dark slate to create visual interest without distracting from the food. Arrange any props (cutlery, napkins, garnishes) intentionally, since the overhead view turns your entire frame into a design composition.
When to Avoid Overhead
Overhead is a poor choice for any dish where height is the main visual appeal. A towering burger, a slice of layer cake, a tall milkshake, or a stacked pile of pancakes will all look flat and unimpressive from directly above. If you cannot see what makes the dish special when looking straight down at it, choose a different angle.
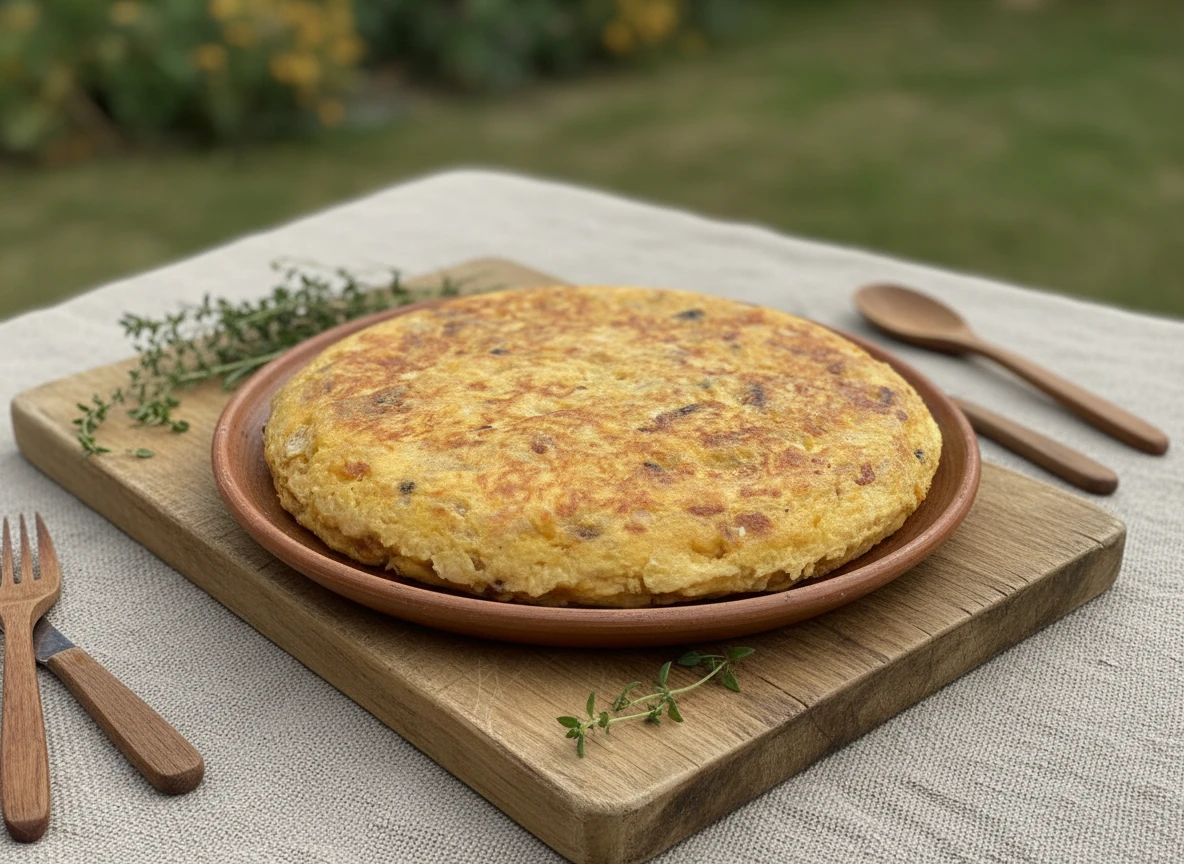
The Classic 45-Degree Angle
The 45-degree angle is the most versatile and widely used angle in food photography. It positions the camera roughly at the same height as a person sitting at a table and looking down at their plate — which is why it feels so natural and inviting. This angle shows both the top of the dish and its front face, giving the viewer a comprehensive look at the food.
Why 45 Degrees Works So Well
The reason this angle is considered the default in food photography is simple: it mimics the diner's perspective. When someone sits down at a restaurant and looks at the plate in front of them, they are seeing it from roughly 45 degrees. This familiarity makes the photo feel immersive — the viewer can almost imagine reaching for a fork. It also balances two important visual elements: the surface detail of the food (toppings, garnishes, textures) and its dimensional form (height, layers, depth).
Best Dishes for the 45-Degree Angle
- Plated entrees: A beautifully plated main course with garnishes and sauce is perfectly served by this angle. You see the arrangement from above while also appreciating the height of stacked components.
- Pasta dishes: The 45-degree angle captures the twirl of spaghetti, the layers of lasagna, and the glossy surface of a sauce-coated dish.
- Rice and curry dishes: The angle shows the relationship between rice and its accompaniments while revealing textures and colors on the surface.
- Dessert plates: Most plated desserts — a slice of pie, a panna cotta, a chocolate fondant — look their best at 45 degrees because the angle captures both the artful top presentation and the satisfying height.
When in doubt about which angle to use, start with 45 degrees. It is rarely the wrong choice, and it gives you a reliable, appetizing result for the vast majority of dishes. Many professional food photography tips guides recommend this angle as the starting point for beginners.
Straight-On (0°)
The straight-on angle places the camera at the exact same level as the dish, looking directly at it from the front. This is the most dramatic angle for food that has impressive height, visible layers, or intricate side details. It is the angle that food magazines use to make a burger look monumental or a cocktail look like a work of art.
Best Dishes for Straight-On Photography
- Burgers and sandwiches: The straight-on angle is the undisputed champion for burgers. It showcases every layer — the bun, the patty, the cheese, the lettuce, the sauce — in a way that no other angle can match.
- Layer cakes and tall desserts: A cross-section view of a multi-layer cake, with its alternating layers of sponge and frosting, is one of the most visually satisfying shots in food photography. Straight-on captures this perfectly.
- Stacked pancakes and waffles: The height of a pancake stack, especially with syrup dripping down the sides, is best captured from eye level.
- Cocktails and beverages: Drinks with layers, gradients, or elaborate garnishes photograph beautifully straight-on. The transparency of the glass and the colors within are fully visible.
- Soup in deep bowls: While overhead might only show the surface of a soup, a straight-on angle reveals the depth of the bowl and any garnishes floating on top, creating a more inviting composition.
Setting Up a Straight-On Shot
Getting a clean straight-on shot requires careful attention to the background, since the camera now sees everything behind the dish — not just the table surface. Use a clean backdrop, a wall, or a styled background surface. Many food photographers use foam boards, fabric, or purpose-built background panels for straight-on shots. Keep the dish centered in the frame and ensure the camera is truly level to avoid any downward or upward tilt that breaks the straight-on effect.
Low Angle
The low angle positions the camera below the level of the dish, looking slightly upward. This is the most dramatic and least commonly used angle in food photography, but when applied to the right dish, it creates a powerful, imposing image that commands attention.
When Low Angle Works
The low angle makes food look larger than life. It adds a sense of grandeur and drama that can be extremely effective for marketing materials, hero images on websites, and social media posts designed to stop the scroll. Tall dishes — towering burgers, elaborate ice cream sundaes, stacked appetizer platters, and multi-tier cakes — benefit the most from this perspective.
The low angle is also useful for capturing action shots: a pour of sauce, syrup dripping down a stack of pancakes, or steam rising from a hot dish. Shooting from below emphasizes the vertical motion and creates a cinematic quality that other angles cannot replicate.
Cautions with Low Angle
Low angle is the hardest angle to execute well. The background becomes the dominant element in the frame, so you need a clean, ideally dark or neutral background to keep the focus on the food. It can also distort proportions in unflattering ways for flat dishes — a plate of pasta shot from below just looks like the underside of a plate. Reserve this angle for dishes with genuine vertical presence and pair it with a controlled background environment.
Three-Quarter Angle (30°)
The three-quarter angle sits between straight-on and the 45-degree angle, typically around 20 to 30 degrees above the dish. It is a subtle but effective variation that works particularly well for dishes served in bowls, deep plates, or vessels with high sides.
Best Dishes for the Three-Quarter Angle
- Soups and stews: The three-quarter angle lets the camera peer just over the rim of the bowl, revealing the surface of the soup with its garnishes while also showing the bowl's form and any elements placed around it.
- Noodle bowls and ramen: Ramen is a perfect candidate for this angle. You see the broth, the noodles, the toppings, and the steam — all without losing the depth and dimensionality of the bowl.
- Smoothie bowls and acai bowls: The carefully arranged toppings on these bowls are best viewed from a slightly elevated angle that shows the surface pattern without going fully overhead.
- Risottos and curries: These dishes sit in shallow bowls or deep plates and benefit from an angle that reveals their creamy texture and garnishes without flattening their dimensional quality.
The three-quarter angle is often the best compromise when a dish has interesting surface detail that you want to highlight but also has enough depth or height that a full overhead shot would lose important visual information.
How to Choose the Right Angle for Your Dish
Choosing the right food photography angle does not need to be complicated. Use this decision framework based on the shape and visual strengths of your dish:
- Flat and spread out (pizza, flatbreads, charcuterie, cookie platters) → Overhead (90°)
- Standard plated dish (entrees, pasta, rice dishes, plated desserts) → 45-degree angle
- Tall with visible layers (burgers, layer cakes, stacked pancakes, drinks) → Straight-on (0°)
- Served in deep bowls (soups, ramen, stews, curries) → Three-quarter angle (30°)
- Dramatic hero shot (towering dishes, action pours, marketing images) → Low angle
The key question to ask yourself before every shot is: what is the most visually interesting feature of this dish? If it is the surface arrangement, go overhead. If it is the layers and height, go straight-on. If you want a natural, inviting look, go 45 degrees. Let the dish itself guide your decision.
Tools like Platora take this a step further by letting you select from professional camera framing presets when enhancing your food photos. Even if your original shot was taken from a basic angle, the AI can optimize the composition and framing to produce a polished, professional result.
Common Angle Mistakes
Even experienced food photographers fall into angle-related traps. Here are the most common mistakes and how to avoid them:
Shooting Everything from the Same Angle
This is the most widespread mistake in restaurant photography. Many restaurants photograph their entire menu from 45 degrees because it is the "safe" choice. The result is visual monotony — every dish looks the same in terms of composition, and the menu feels repetitive. A burger should not be shot the same way as a pizza. A soup should not be shot the same way as a charcuterie board. Match the angle to the dish, and your menu will have variety and visual energy.
Not Matching the Angle to the Dish Shape
Shooting a tall burger from overhead hides its most impressive feature — the stacked layers. Shooting a flat pizza from straight-on shows nothing but crust. Every dish has a shape that naturally suits certain angles, and forcing a mismatch produces underwhelming photos no matter how good the lighting and styling are. Before you shoot, take five seconds to consider the dish's geometry and pick the angle that reveals its best qualities.
Ignoring the Background at Lower Angles
When shooting overhead, the background is just the table surface, which is easy to control. But as you lower the camera — from 45 degrees down to straight-on and low angles — the background shifts from the table to whatever is behind the dish: kitchen equipment, other tables, signage, or just a cluttered wall. Failing to account for this is one of the fastest ways to ruin an otherwise well-composed food photo. Always check what the camera sees behind the dish, and clean up or control that space before shooting.
Tilting at Undefined Angles
Intermediate angles that do not commit to a specific perspective — neither overhead nor 45 degrees, just somewhere vaguely in between — tend to look indecisive and unflattering. The image feels like the photographer was not sure where to stand. Commit to a specific angle. If you want overhead, go fully overhead. If you want 45 degrees, position the camera deliberately. Precision in your angle choice produces photos that feel intentional and professional.
Combining Angles for Menus and Social Media
When photographing a full menu or building a cohesive social media feed, using a variety of angles creates visual interest while maintaining professional consistency. Here is how to approach angle variety strategically:
Variety Within a Menu
A restaurant menu with 20 dishes should not use 20 identical angles. Group your dishes by type and assign the most flattering angle to each category. Shoot your burgers and sandwiches straight-on, your salads and pizzas overhead, your entrees at 45 degrees, and your soups at the three-quarter angle. This variety makes the menu visually dynamic and helps each dish stand out on its own terms.
Consistency Within a Category
While you want variety across the full menu, maintaining angle consistency within a category creates a polished, branded feel. If your three burgers are all shot straight-on with the same background, they look like they belong together. This category-level consistency is especially important for delivery platforms where customers compare items side by side.
Social Media Feed Balance
On Instagram and other visual platforms, alternating angles creates a feed that feels curated without being repetitive. Avoid posting three overhead shots in a row or five straight-on shots in sequence. Mix your angles across posts to keep your feed visually engaging. A common pattern among successful food accounts is alternating between overhead table spreads, 45-degree plated dishes, and straight-on hero shots.
If you are using Platora to enhance your food photos, you can batch-process multiple dishes at once, selecting the optimal framing for each. This makes it practical to produce a complete set of angle-varied, professionally enhanced images in a single session — something that would take hours with traditional photography but takes minutes with AI.
Conclusion
Mastering food photography angles is one of the highest-impact improvements you can make to your food images. The right angle highlights the best features of every dish — the surface patterns of a pizza, the towering layers of a burger, the creamy depth of a ramen bowl — while the wrong angle hides those very features. The five angles covered in this guide (overhead, 45-degree, straight-on, low, and three-quarter) are all you need to photograph any dish in the most flattering way possible.
The takeaway is simple: let the dish dictate the angle. Ask what makes each dish visually special, then position your camera to showcase exactly that. Combine this angle awareness with solid composition techniques and strong photography fundamentals, and you will produce images that look truly professional.
Ready to take your food photos to the next level? Platora enhances your food photographs with AI-powered professional styling, letting you choose from expert camera framing presets to get the perfect composition every time. Upload a photo and see the difference in seconds — no studio, no equipment, no editing skills required.