Dessert photography occupies a uniquely demanding corner of food photography. Unlike savory dishes that can sit under lights for minutes without losing their appeal, sweet treats are often fragile, temperature-sensitive, and covered in reflective surfaces that challenge even experienced photographers. A scoop of gelato begins melting the moment it leaves the freezer. Whipped cream slowly deflates. Chocolate ganache catches every light source in the room as a harsh glare.
Yet desserts are also among the most visually rewarding subjects to photograph. The vibrant colors of fresh berries on a tart, the satisfying layers of a cross-sectioned cake, the rustic charm of a freshly baked loaf dusted with flour — these images stop people mid-scroll and drive real engagement on menus and delivery platforms. Bakeries, patisseries, and restaurants that invest in strong dessert photography consistently outperform those that rely on quick, unplanned snapshots.
This guide covers everything you need to know to photograph desserts and baked goods like a professional — from lighting setups and camera angles to styling tricks, prop selection, and post-processing techniques that bring out the best in every sweet creation.
Lighting for Desserts
Lighting is the single most important factor in dessert photography, and it presents challenges you rarely encounter with other types of food. Glazes, frostings, chocolate coatings, and sugar decorations are all highly reflective surfaces that can produce distracting hot spots if lit incorrectly. At the same time, desserts rely on texture — the crackle of a crème brûlée top, the flaky layers of a croissant, the crumb of a freshly sliced cake — and flat, even lighting will erase those textures entirely. For a comprehensive deep dive into food photography lighting, see our food photography lighting guide.
Soft, diffused light is your best friend. Whether you are using natural window light or artificial strobes, always diffuse the light source. A large window covered with a sheer white curtain creates beautiful, even illumination that wraps around desserts without creating harsh reflections. If you are using studio lights, shoot through a large softbox or bounce the light off a white reflector card. The larger your light source relative to the subject, the softer the shadows and the fewer problematic reflections you will deal with.
Side lighting at 45 degrees is the most versatile setup for bakery photography. It creates gentle, directional shadows that reveal texture — the ridges in buttercream, the bubbles on a sourdough crust, the sugar crystals on a doughnut. Position your main light source to the side and slightly behind the dessert, then use a white foam board on the opposite side to fill in the shadows. This setup works for nearly every baked good and keeps reflections manageable on glossy surfaces.
Backlighting is powerful for translucent elements. Thin pastry dough, honey drizzles, caramel sauce, fruit slices, and beverages all come alive when lit from behind. Backlighting creates a luminous glow that makes these elements look rich and appetizing. When shooting a dessert with a caramel or chocolate drizzle, try positioning your light source directly behind the subject — the sauce will catch the light beautifully, appearing warm and glossy rather than flat and dull.
Avoid direct flash and overhead lighting at all costs. Direct flash creates flat, washed-out images with harsh shadows and intense reflections on every glossy surface. Overhead fluorescent or LED panel lights eliminate the shadows that give desserts their three-dimensional, textured appearance. If you must shoot under overhead kitchen lights, add a side light source and block the overhead light with a flag or dark card to restore directionality.
Best Angles for Different Desserts
There is no single "best angle" for dessert photography — the ideal perspective depends entirely on the shape, height, and design of the specific treat. Choosing the wrong angle can make a stunning dessert look flat and unimpressive, while the right angle instantly communicates its appeal.
Overhead (90 Degrees) for Flat Desserts
Flat lay photography works best for desserts that are primarily viewed from above — cookies arranged on a baking sheet, a tart with an intricate fruit pattern, a pizza-style flatbread dessert, or an assortment of petit fours on a platter. Overhead shots also excel for scenes where the arrangement and composition of multiple items matter more than any single piece. This angle is perfect for capturing the full surface design of a beautifully decorated cake top or a symmetrical arrangement of macarons.
45 Degrees for Plated Desserts
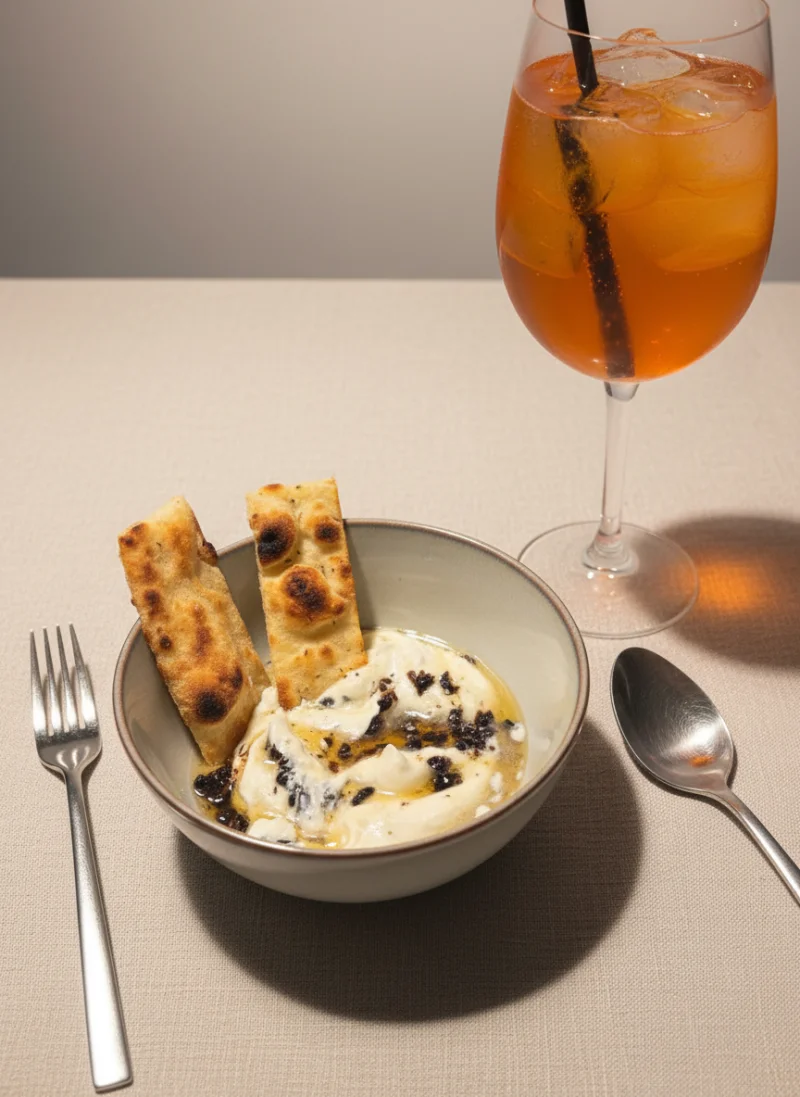
The 45-degree angle is the most natural and versatile perspective for dessert photography because it mimics the way we actually see food on a table. This angle works beautifully for plated desserts, cupcakes, bowls of mousse, parfaits, and any dessert with moderate height. It captures both the top detail and the side profile, giving the viewer a complete understanding of the dessert. A slice of cheesecake, a crème brûlée with a cracked sugar top, or a plated chocolate fondant all shine at this angle.
Straight-On (0 Degrees) for Layer Cakes and Tall Desserts
When height is the hero, shoot straight-on. Multi-layer cakes, towering stack pancakes, tall milkshakes with elaborate toppings, and tiered desserts all look their most impressive from eye level. This angle emphasizes verticality and lets you showcase side decorations, drip effects, and the dramatic stacking that makes these desserts visually striking. For a sliced layer cake, a slight angle (around 15-20 degrees) lets you show both the interior layers and the exterior decoration simultaneously.
Styling Sweet Treats
Styling is where dessert photography transforms from documentation into art. The small, intentional details you add — or strategically leave — create the difference between a photo that looks clinical and one that makes viewers crave the dessert.
Embrace crumbs and imperfection. A perfectly pristine scene can feel sterile and staged. A few scattered cookie crumbs, a bite taken from a brownie, or a croissant torn open to reveal its flaky interior — these details signal freshness and authenticity. They tell the viewer that this is real food, recently baked and ready to eat, not a prop in a museum. Position crumbs intentionally near the main subject, not randomly across the entire frame.
Drips and drizzles add motion and energy. A slow drizzle of chocolate sauce over a slice of cake, caramel pooling naturally around a dessert, or honey running down the side of a stack of pancakes — these elements create a sense of movement that makes static images feel dynamic. Capture drizzles in action when possible, or style them to look as though they are mid-flow. The key is making the drip look natural, not perfectly centered or overly controlled.
Dustings create atmosphere. A light dusting of powdered sugar over a lava cake, cocoa powder sifted over tiramisu, or cinnamon sprinkled across a chai-spiced dessert adds a professional, bakery-fresh quality to any shot. For the most photogenic effect, dust just before shooting — the fine particles catching the light create a beautiful, ethereal layer. Use a fine-mesh sieve held about 12 inches above the dessert for an even, delicate distribution.
Fresh fruit garnishes add color and contrast. A handful of fresh raspberries on a chocolate cake, sliced strawberries fanned across a cheesecake, or a sprig of mint on a panna cotta — fresh elements provide pops of natural color that make desserts look vibrant and premium. Choose fruits that complement the dessert both visually and in flavor. The fruit should look freshly picked: glossy, firm, and without blemishes.
Sauce work builds story. A pool of berry coulis beneath a panna cotta, a smear of chocolate on the plate, or a carefully drawn caramel spiral — sauces add color, context, and visual interest to otherwise simple plating. Use a squeeze bottle for precise lines and dots, or a spoon for organic, chef-style swooshes. Practice on an empty plate before committing to the final shot.
Color and Composition
Desserts are inherently colorful subjects — from the deep brown of chocolate to the pastel hues of macarons to the bright reds and yellows of fruit tarts. How you manage color and composition in the frame determines whether the image feels harmonious and professional or chaotic and amateur.
Use complementary colors for visual impact. Complementary colors sit opposite each other on the color wheel and create strong visual contrast when paired together. A warm-toned dessert (caramel, chocolate, golden pastry) looks stunning against a cool blue or teal background. Red berries pop against green mint or pistachio. A purple lavender cake stands out beautifully on a warm, golden wood surface. Understanding basic color theory gives your dessert photos an immediate visual sophistication.
Neutral backgrounds let the dessert shine. While bold backgrounds can work for editorial shots, neutral tones — white marble, light grey linen, warm wood, dark slate — are the safest and most effective choice for bakery photography. They direct all attention to the dessert itself and create a clean, professional aesthetic that works across menus, websites, and delivery platforms. For more on choosing the right backgrounds, check out our guide on food photography props and backgrounds.
Negative space gives the eye room to rest. Resist the urge to fill every inch of the frame with props and decorations. Leaving empty space around the dessert — whether it is a clean section of the background, an empty portion of the plate, or open area in the composition — creates a sense of elegance and draws the viewer's eye directly to the subject. High-end bakeries and patisseries almost always use generous negative space in their imagery because it communicates quality and refinement.
The rule of odds creates natural compositions. When photographing multiple desserts, arrange them in groups of three or five rather than two or four. Odd numbers create more dynamic, visually interesting arrangements that feel natural rather than rigid and symmetrical. Three cupcakes arranged in a loose triangle, five cookies scattered organically across a surface, or a main dessert flanked by two smaller supporting elements — odd groupings guide the eye through the image more effectively.
Photographing Specific Desserts
Each category of dessert presents unique challenges and opportunities. Here are targeted techniques for the most common types:
Cakes
Whole cakes look best shot straight-on to emphasize height and decoration, while sliced cakes benefit from a slight angle (20-45 degrees) to reveal the interior layers. For a hero shot, remove one slice and pull it slightly forward on a separate plate — this shows both the complete cake and its inner structure. Use a very sharp, clean knife dipped in hot water for the cleanest cuts. Style the slice with a few crumbs and a fork to suggest someone is about to dig in.
Cookies
Cookies are best photographed overhead in groups (use the rule of odds) or at a slight angle to show their thickness and texture. Stack two or three cookies with one leaning against the stack for a classic, inviting composition. Break one cookie in half and show the interior — a gooey chocolate chip center or a soft, chewy middle communicates texture that a surface-only shot cannot. Shoot cookies within minutes of baking for the most appealing texture: slightly glossy, with visible cracks and soft edges.
Pastries
Croissants, danishes, puff pastry items, and laminated doughs are all about flakiness and layers. Use strong side lighting to create shadows between each layer, emphasizing the lamination and texture. Tear one pastry open rather than cutting it — the jagged, organic interior is far more appealing than a clean cut. Photograph pain au chocolat and filled pastries at a 45-degree angle to show both the golden exterior and a glimpse of the filling.
Ice Cream
Ice cream is the most time-sensitive subject in all of dessert photography. You have roughly 2-3 minutes under studio lights before a perfect scoop becomes an unappealing puddle. Prepare everything — background, props, lighting, camera settings — before the ice cream leaves the freezer. Use a scoop dipped in warm water for perfectly round, smooth scoops with visible texture. Some photographers keep the ice cream in the freezer between test shots and only bring it out for the final frames. Work fast, and do not be afraid to use multiple scoops if the first one melts before you get the shot.
Chocolate
Chocolate is simultaneously one of the most photogenic and most frustrating dessert subjects. Its glossy surface reflects every light source in the room, and fingerprints show immediately. Handle chocolate with gloves, and use carefully controlled side lighting to create a single, clean highlight rather than multiple scattered reflections. Dark chocolate benefits from backlighting, which brings out the rich, warm tones within the brown. Pair chocolate desserts with contrasting textures and colors — gold leaf, red berries, white cream — to prevent the image from feeling monochromatic.
Bread
Artisan bread photography is about crust, crumb, and warmth. Strong side lighting dramatically emphasizes the texture of a crusty boule or baguette. Always include a shot of the bread sliced or torn open — the interior crumb structure is visually fascinating and signals quality to the viewer. Photograph bread on rustic surfaces (wooden cutting boards, linen cloths) and consider adding flour dust on the surface and the bread itself for a fresh-from-the-oven feeling. Steam can be added in post-processing or captured naturally if you shoot immediately after baking.
Props for Bakery Photography
The right props elevate dessert photography from a product shot to a story. They provide context, create atmosphere, and make the viewer feel as though they have stepped into a beautiful bakery or kitchen. However, props should always support the dessert, never compete with it. For a comprehensive guide on selecting and using props effectively, see our food photography props and backgrounds guide.
Vintage and ceramic plates add character without overwhelming the subject. Matte-finish plates in neutral tones (white, cream, soft grey, terracotta) are the most versatile. Avoid shiny, patterned, or brightly colored plates — they compete with the dessert for attention and create unwanted reflections. Collect a variety of plate sizes: small dessert plates for individual servings, larger plates for cakes, and rimless boards for rustic presentations.
Linen napkins and towels introduce softness and texture to the scene. Loosely folded (never perfectly pressed) linen in natural, muted tones — ivory, stone, dusty blue, sage — adds a handmade, artisanal quality. Drape a linen napkin casually beside the dessert or beneath the plate. The wrinkles and folds create visual interest in otherwise empty areas of the frame.
Baking tools as props tell the story of how the dessert was made. A wooden rolling pin, a flour-dusted pastry brush, a wire cooling rack, a piping bag with a decorative tip, vintage measuring cups — these items instantly communicate "freshly baked" and create an emotional connection with the viewer. Place them in the background or at the edge of the frame, slightly out of focus, to suggest the baking process without distracting from the finished product.
Raw ingredients as supporting elements provide context and visual variety. A small bowl of fresh berries beside a berry tart, scattered cocoa nibs near a chocolate cake, vanilla beans next to a custard, or a few whole nuts beside a nut-studded brownie — these ingredients explain the dessert's flavor profile visually and add splashes of color and texture. Keep ingredient props small and scattered, not piled up or overly abundant.
Dealing with Challenging Textures
Desserts present more texture challenges than almost any other category of food photography. Here is how to handle the most common trouble spots:
Glossy Glazes and Mirror Finishes
Glazed donuts, mirror-glaze cakes, and ganache-topped desserts reflect everything in the room — including you and your camera. The solution is to control reflections rather than eliminate them entirely. A single, clean highlight from a diffused light source looks intentional and appetizing, while multiple scattered reflections look messy. Position your light so the main reflection falls on the most flattering part of the glaze. Use a large white card as your reflector and keep all other reflective surfaces (windows, screens, light-colored walls) behind dark flags or blocked off.
Powdered Sugar and Cocoa Dust
Powdered sugar looks magical when freshly dusted but turns translucent and disappears within minutes as it absorbs moisture from the dessert. Always apply powdered sugar as the very last step, immediately before taking the photo. If you are shooting multiple angles, re-dust between setups. Use a fine-mesh sieve for even distribution and work about 12-18 inches above the dessert. Backlighting or strong side lighting makes the individual particles visible, creating that dreamy, bakery-fresh sparkle.
Whipped Cream and Meringue
Whipped cream begins to weep and deflate within minutes, especially in warm environments. Work quickly and have everything prepared before piping or dolloping the cream. Over-whip your cream very slightly (just past soft peaks) to buy yourself extra stability — it will still look natural in photos but hold its shape longer. For meringue toppings, torch them just before shooting for the freshest-looking golden tips. If you need more time, stabilized whipped cream (with a small amount of gelatin or cream cheese) holds its shape significantly longer without looking different in photos.
Melting Items
Ice cream, gelato, chocolate fondant centers, warm cheese on desserts — anything that melts presents a race against time. The best strategy is preparation and speed. Set up your entire scene with a stand-in (a scoop of mashed potato works as an ice cream substitute for framing and lighting) and only introduce the real melting element at the very end. Take continuous burst shots and accept that you may need multiple attempts. A slight amount of melting can actually look appealing and natural — it signals that the dessert is real and freshly made.
Editing Dessert Photos
Post-processing is where good dessert photos become great ones. The goal of editing is to enhance what is already there — making the image match how the dessert looked in person — not to create something artificial. Here are the key adjustments for dessert photography:
Enhance warmth carefully. Baked goods generally look more appetizing with slightly warm tones — they evoke the feeling of a cozy bakery and fresh-from-the-oven warmth. Increase the color temperature slightly (add a touch of yellow/orange to the white balance) but stop before the image looks orange or unnaturally golden. The sweet spot is usually 100-300 Kelvin warmer than neutral. Be especially careful with white elements: white plates, powdered sugar, and whipped cream should remain clean white, not yellow.
Sharpen textures selectively. Texture is the defining visual quality of most baked goods. Apply local sharpening to the crust of bread, the crackle of a cookie surface, the layers of a croissant, or the crumb of a sliced cake. Avoid over-sharpening glossy surfaces like glazes and frostings — this creates unnatural halos and noise. In Lightroom or similar tools, use the masking feature to target sharpening only to areas with actual texture detail.
Get white balance right for accurate frosting colors. Incorrect white balance is the most common editing mistake in dessert photography. When white frosting looks yellow, pink macarons look orange, or lavender icing looks grey, customers receive a misleading impression of the product. Use a grey card during the shoot for reference, or manually adjust white balance in post until whites look truly white. Pay special attention to pastel colors, which shift dramatically with even small white balance errors. If you photograph for a bakery that creates custom-colored cakes, accurate color reproduction is essential.
Boost vibrance over saturation. When you want the colors in your dessert to pop — the deep red of strawberries, the rich brown of chocolate, the bright green of pistachios — reach for the vibrance slider rather than saturation. Vibrance intelligently boosts muted tones while leaving already-saturated colors alone, producing a natural-looking enhancement. Saturation increases all colors equally, which quickly makes images look artificial and over-processed.
Clean up distractions. Remove any stray crumbs that land outside the intentional styling area, wipe out small smudges on plates or surfaces, and clean up any fingerprints on chocolate or glossy items. These small retouching steps take seconds in any editing tool but make a significant difference in the final image's professionalism. Tools like Platora can handle these enhancements automatically, saving you hours of manual editing work.
Conclusion
Dessert and bakery photography rewards patience, preparation, and attention to detail. The fundamentals — soft diffused lighting, the right angle for each dessert type, intentional styling, and thoughtful composition — remain consistent regardless of whether you are shooting a single cupcake or a full bakery display. Master these principles, and your dessert images will consistently drive engagement, build appetite appeal, and convert browsers into buyers on menus and delivery platforms.
The biggest challenge in dessert photography is time. Melting ice cream, deflating cream, and disappearing powdered sugar demand that you prepare thoroughly before the dessert enters the frame. Set up your scene, dial in your lighting, choose your angle, and frame the shot with a stand-in — then bring in the real dessert and work efficiently. With practice, this preparation becomes second nature, and you will consistently capture stunning images on the first few attempts.
If you want to take your dessert photos to the next level without the complexity of manual lighting setups and extensive editing, Platora can transform your bakery and dessert photos into professionally styled images in seconds — perfect for menus, delivery apps, and social media. Upload a photo of your latest creation and see the difference AI-powered enhancement makes.